
Understanding Color Separation
Understanding color separation in Adobe Photoshop is a crucial step in screen printing. CMYK is a standard color printing process commonly used in offset printing to produce full-color photographic images by building layers with transparent process inks: Cyan, Magenta, Yellow, and blacK (Key).
CMYK Color Separation Module
Introduction
Understanding color separation in Adobe Photoshop is a crucial step in screen printing. CMYK is a standard color printing process commonly used in offset printing to produce full-color photographic images by building layers with transparent process inks: Cyan, Magenta, Yellow, and blacK (Key).
Explanation
RGB and CMYK
There are two main color modes for image documents: RGB and CMYK. RGB is a light-based color mode used by monitors, cameras, and images from the internet. For printing, CMYK is commonly used because physical inks work subtractively.
Channels
In Adobe Photoshop, the Channels panel manages color information, transparency, and image selections. For CMYK color separation, this color information is already available in the basic CMYK components as grayscale values.
Bitmap Mode
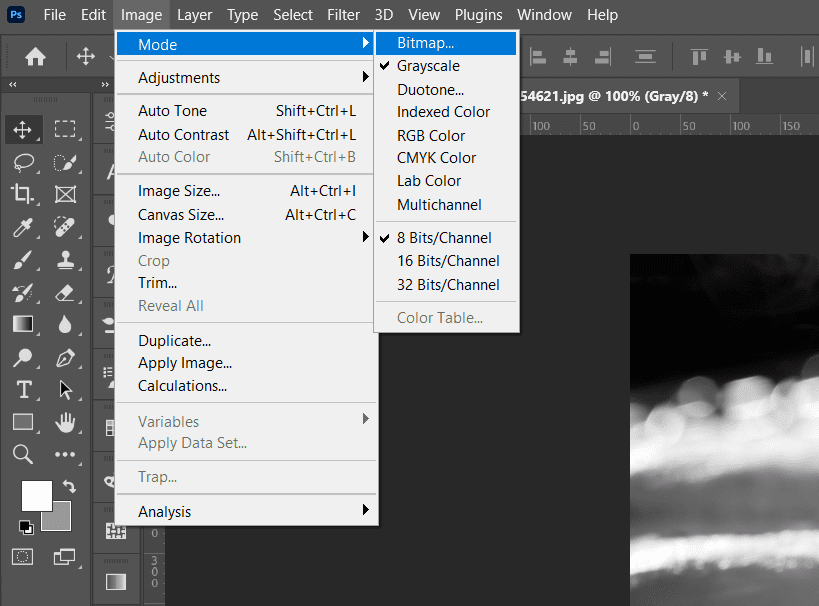
Bitmap mode is important for screen printing because its main function is to convert continuous pixel-based images (gradients) into a pattern of dots (raster), commonly called halftone.
Image Preparation
Before starting the color separation process, make sure the image meets the standard print resolution of 300 dpi (pixels/inch).
Select Image> Image Size.
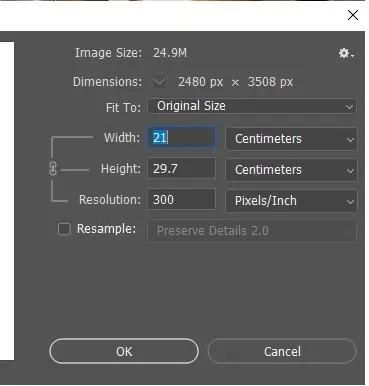
Once the image size and resolution are correct, convert the image from RGB mode to CMYK.
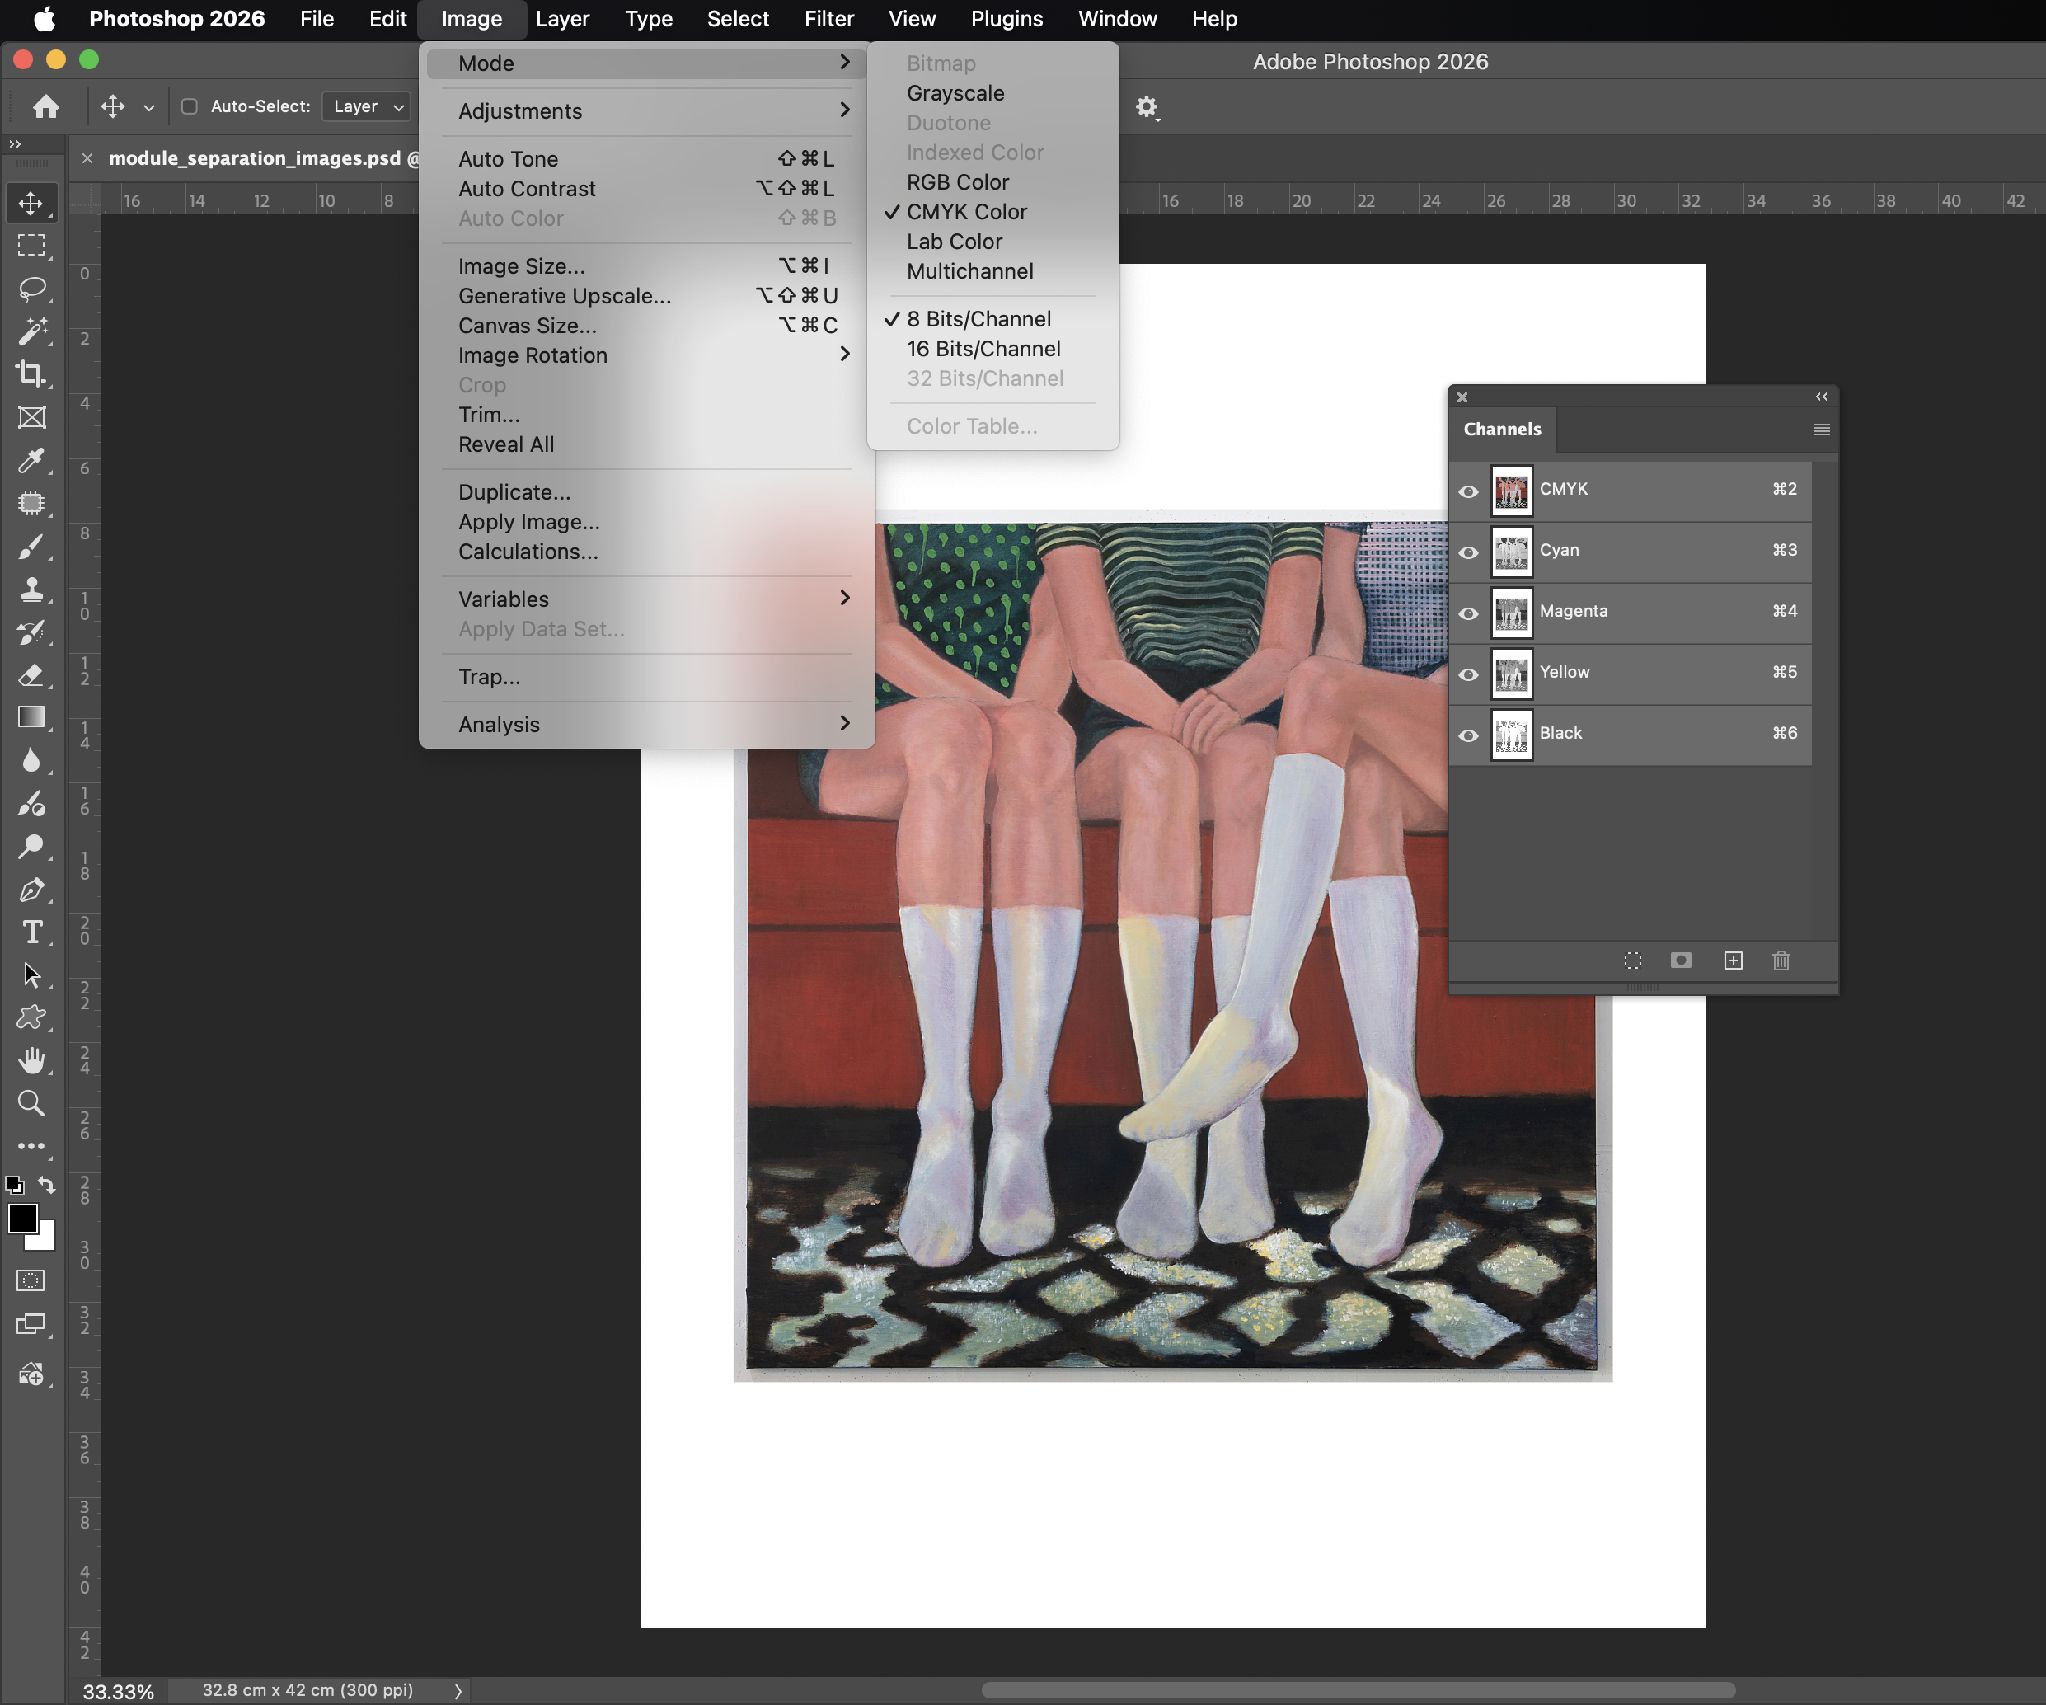
Select Image > Mode > CMYK.
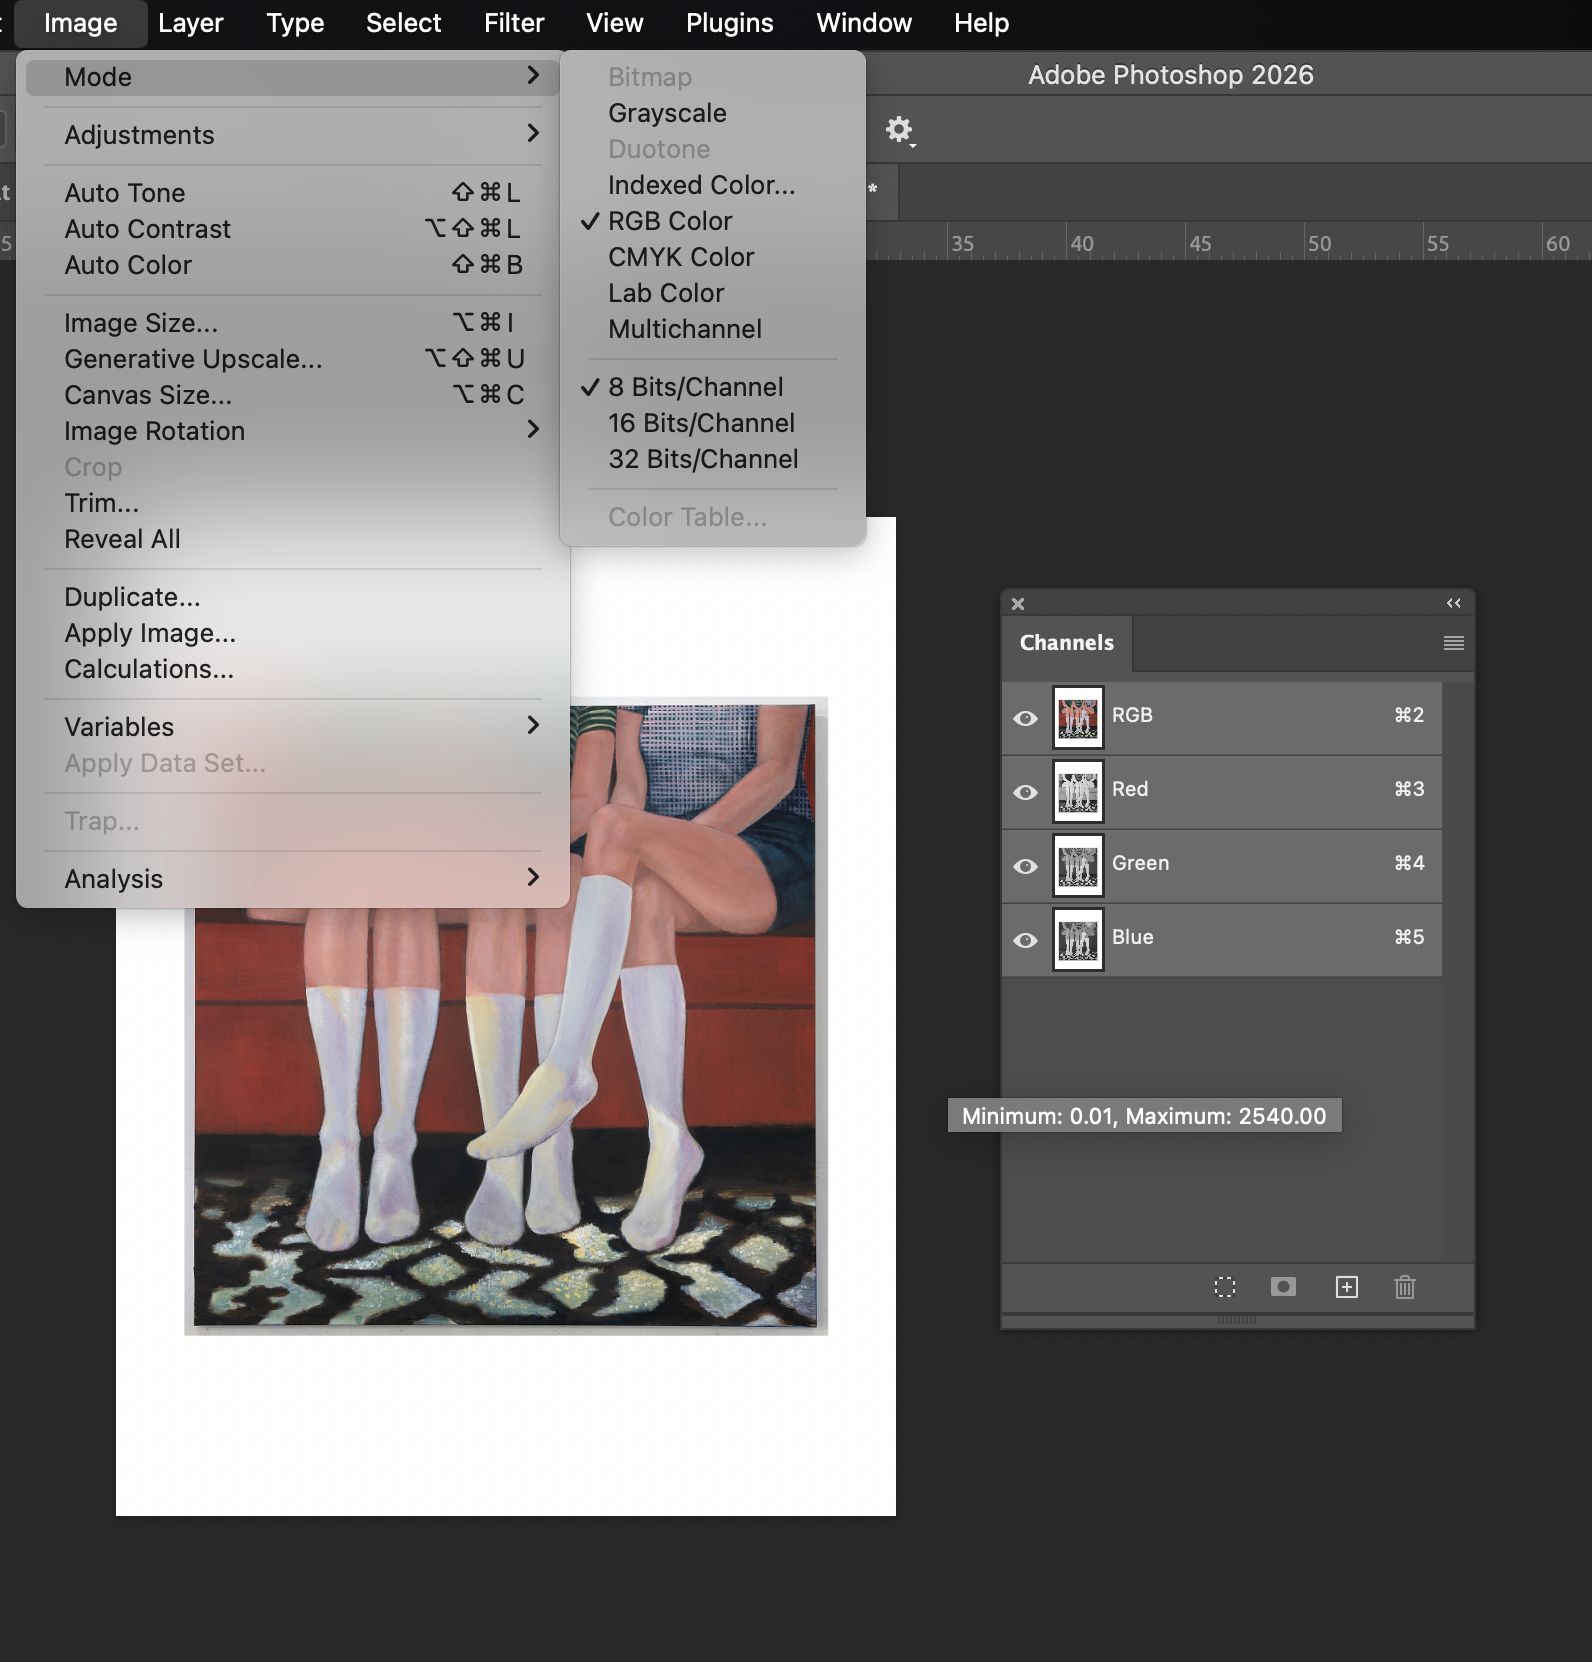
Fig. 1. RGB Color Mode
Fig. 2. CMYK Color
After changing the color mode, you will notice a reduction in color intensity, especially in bright colors such as red, blue, and green.
Separation Process
The goal of this stage is to convert the CMYK color information from standard channels into spot colors, meaning one solid color per channel, which will later be printed as a separate screen layer. This is the opposite of offset printing, where four transparent colors are overprinted; in screen printing, each color requires its own film or separation with clearly defined boundaries.
Using Channels, we can simulate the colors we want to print. The first step is to create a simulation of the desired printing material by creating one alpha layer. Click the + icon below the Channels panel. (Fig. 3)
Fig. 3. Create New Channel
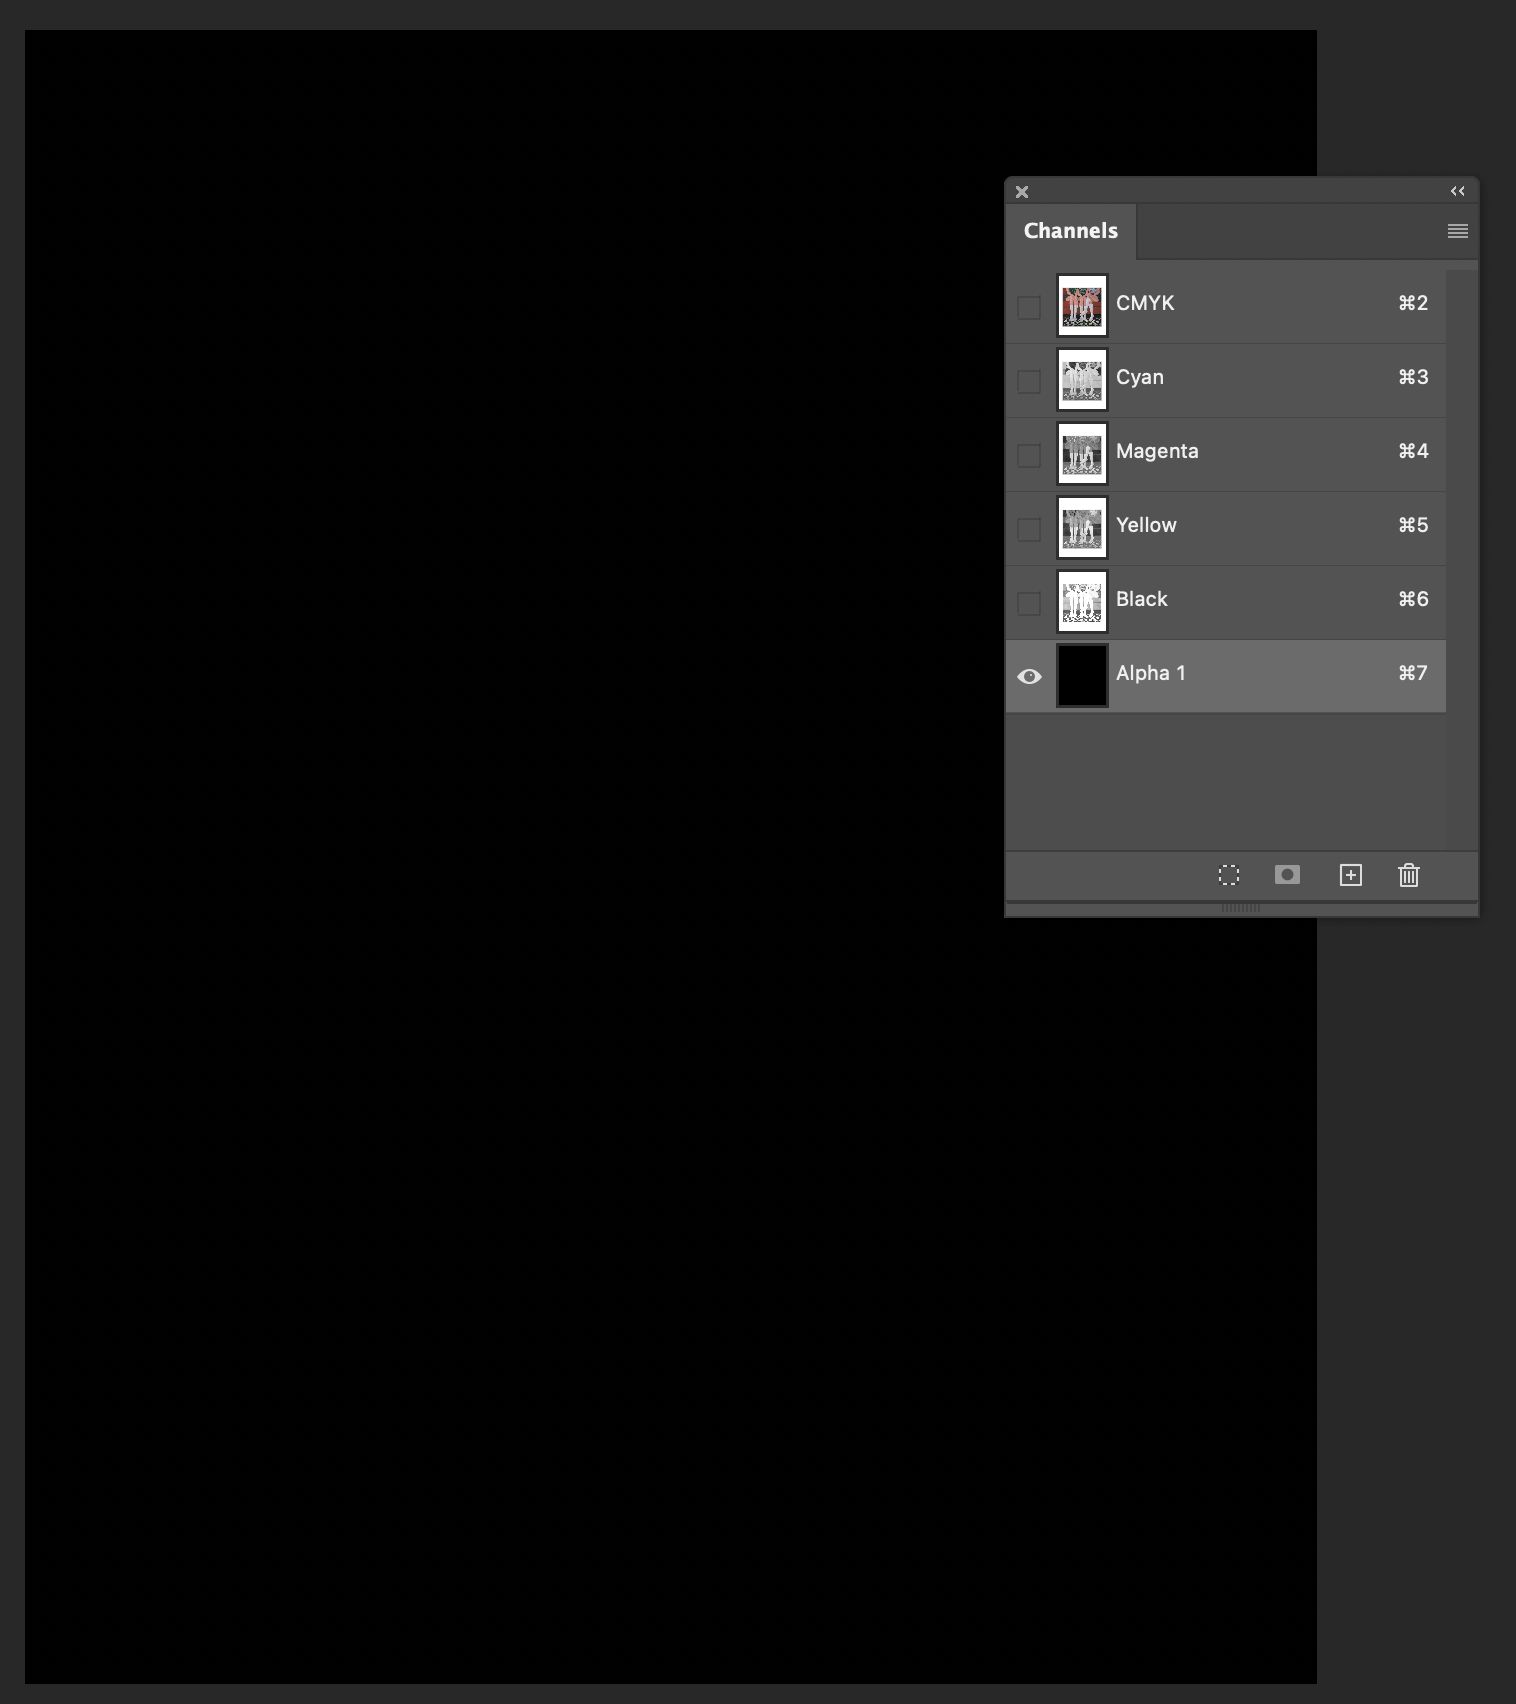
Double-click the Alpha 1 thumbnail. The Channel Options panel will appear; change it to Spot Color. (Fig. 4)
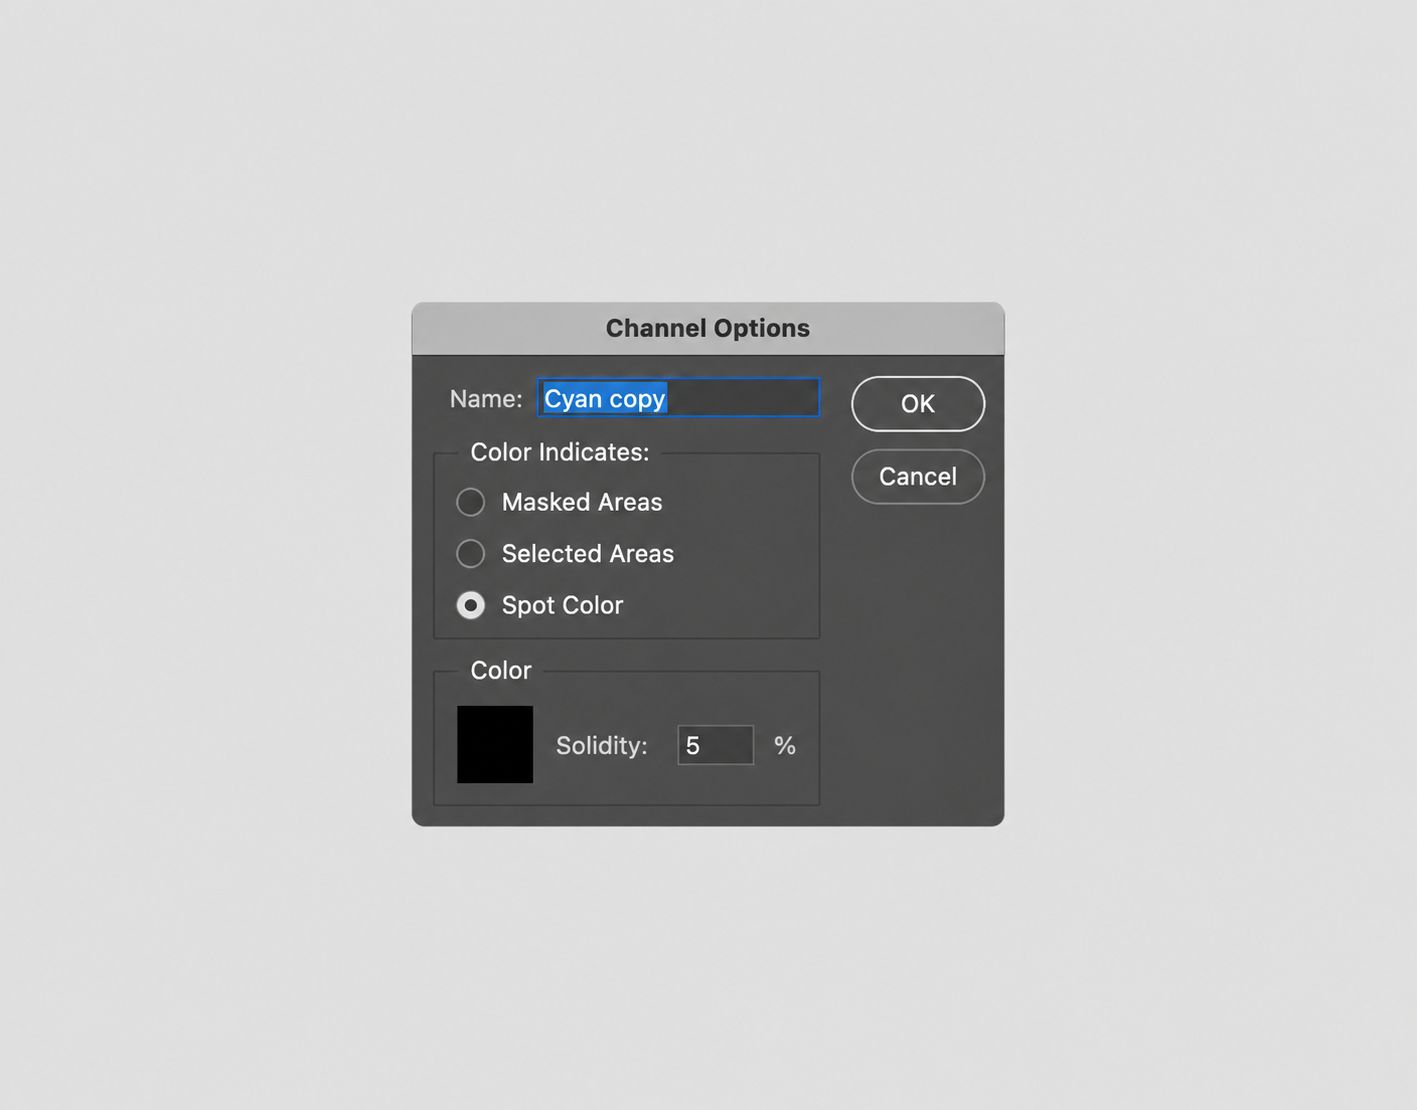
Fig. 4. Channel Options
In the Channels panel, the screen order is read from top to bottom, unlike the Layer panel. The next step is to copy all the color information for Cyan, Magenta, Yellow, and Black (Key) by right-clicking with the mouse (or trackpad) and selecting Duplicate. Repeat this step individually for all four channels: Cyan, Magenta, Yellow, and Black (Key).
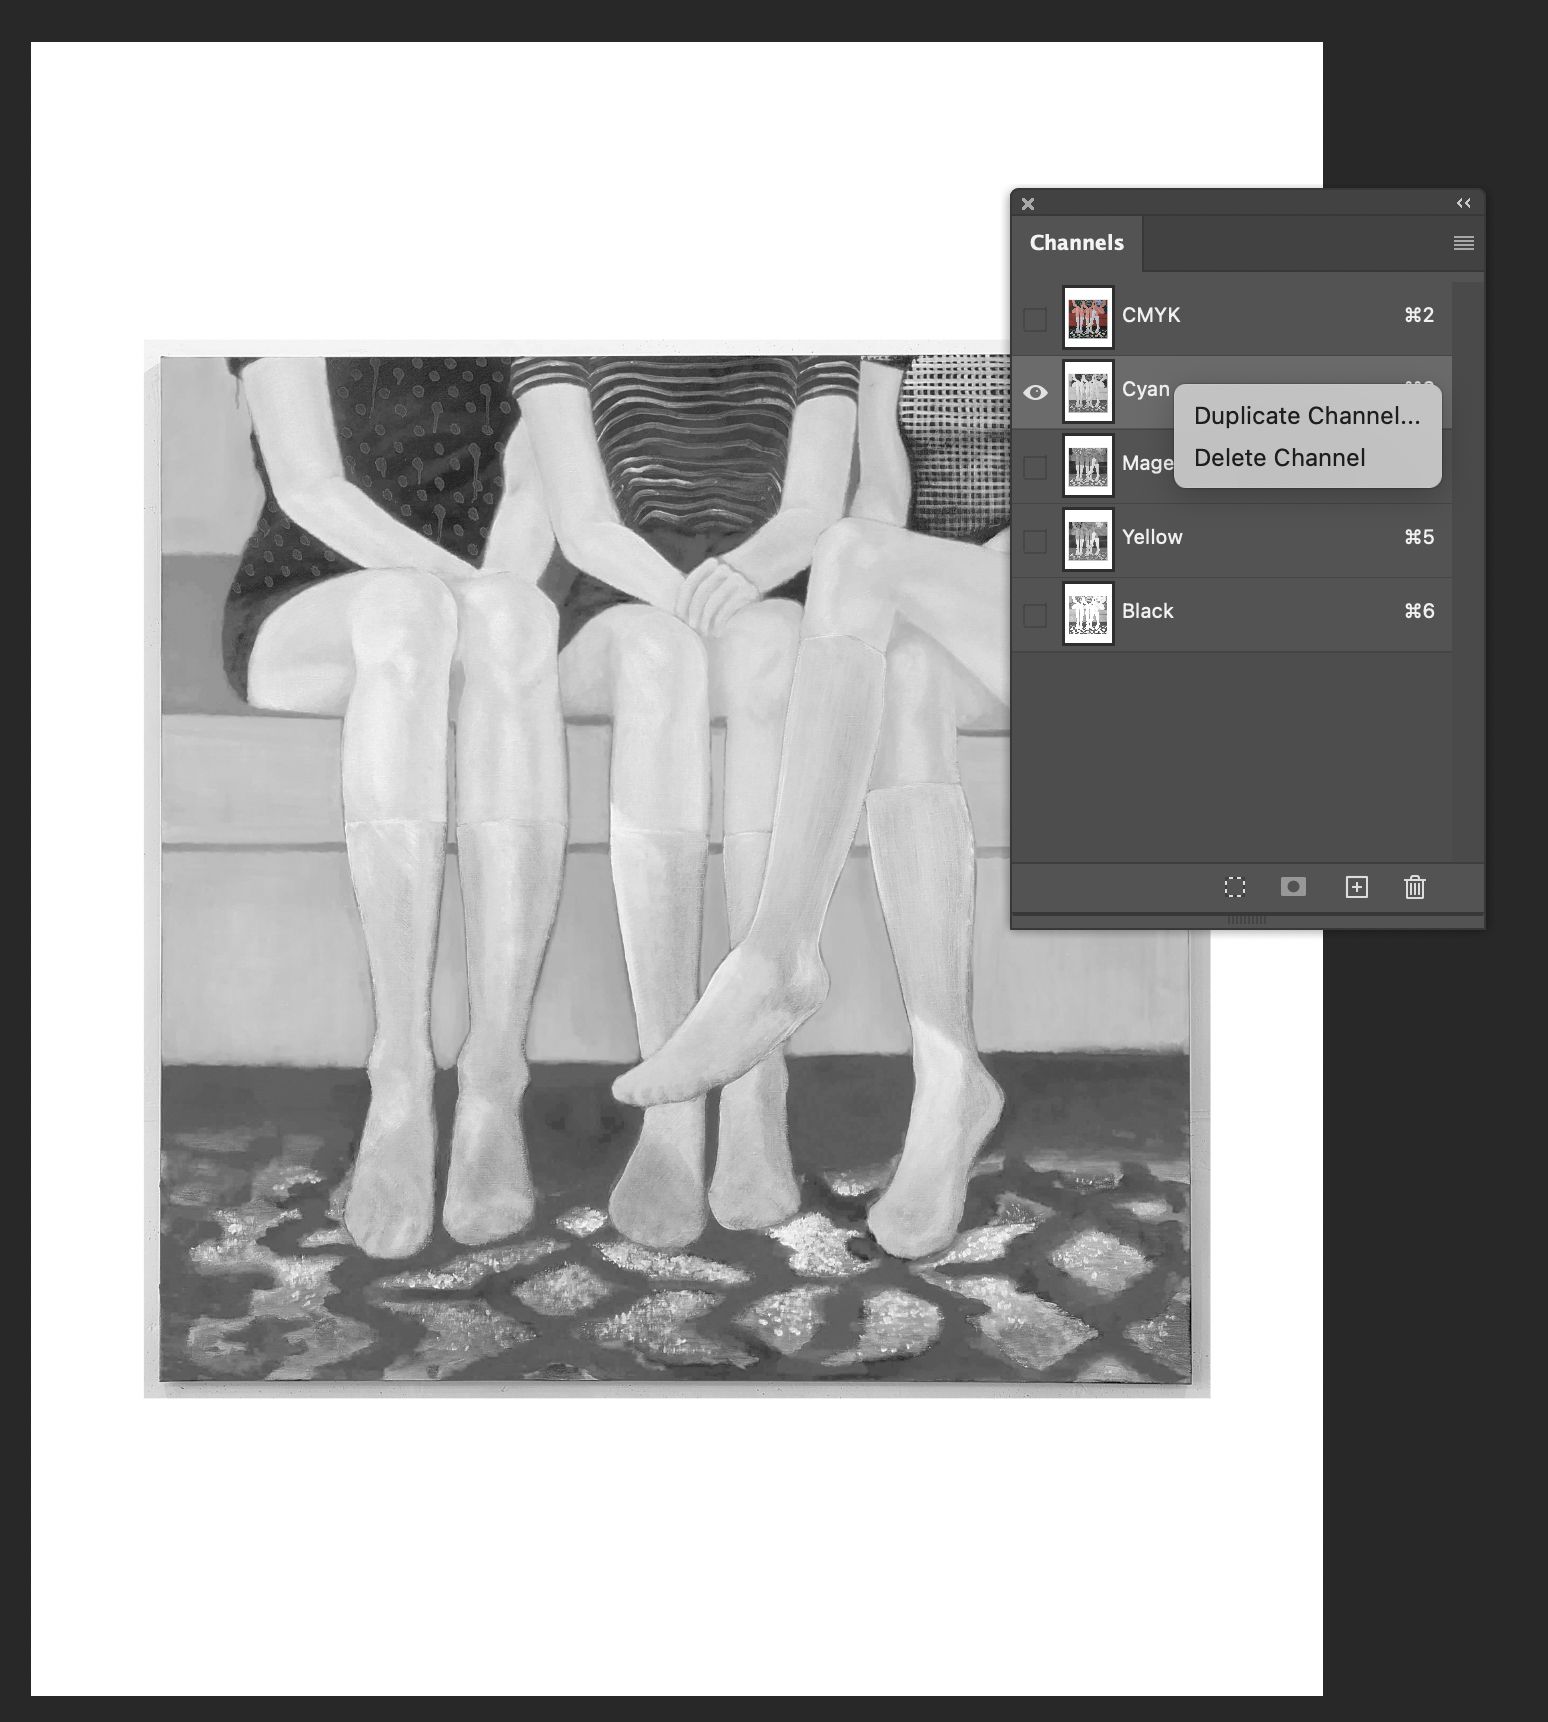
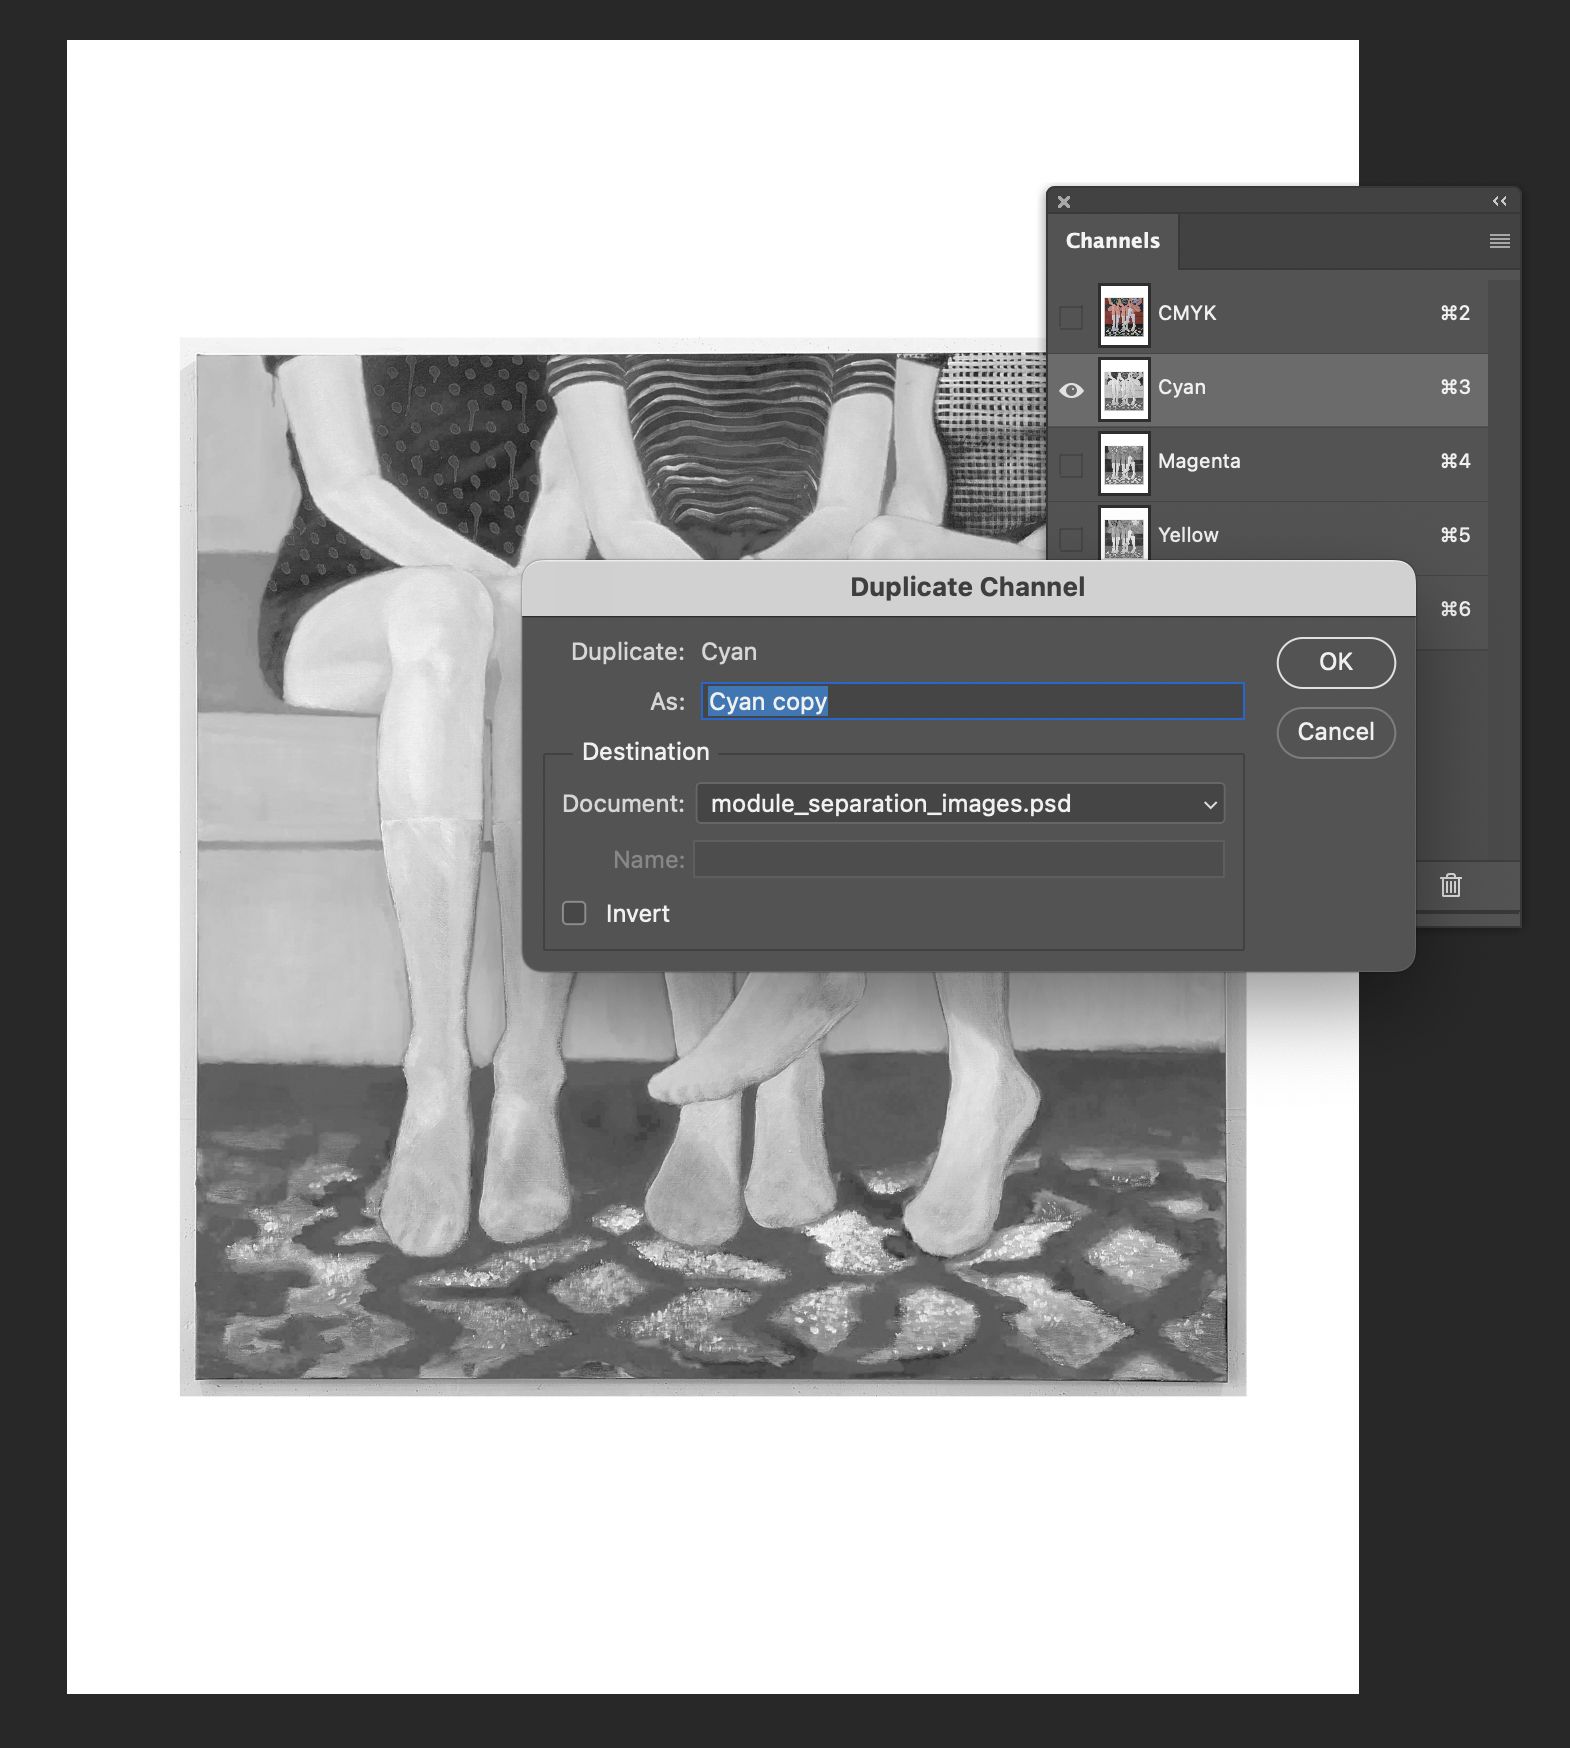
Fig. 5. Duplicate Channel
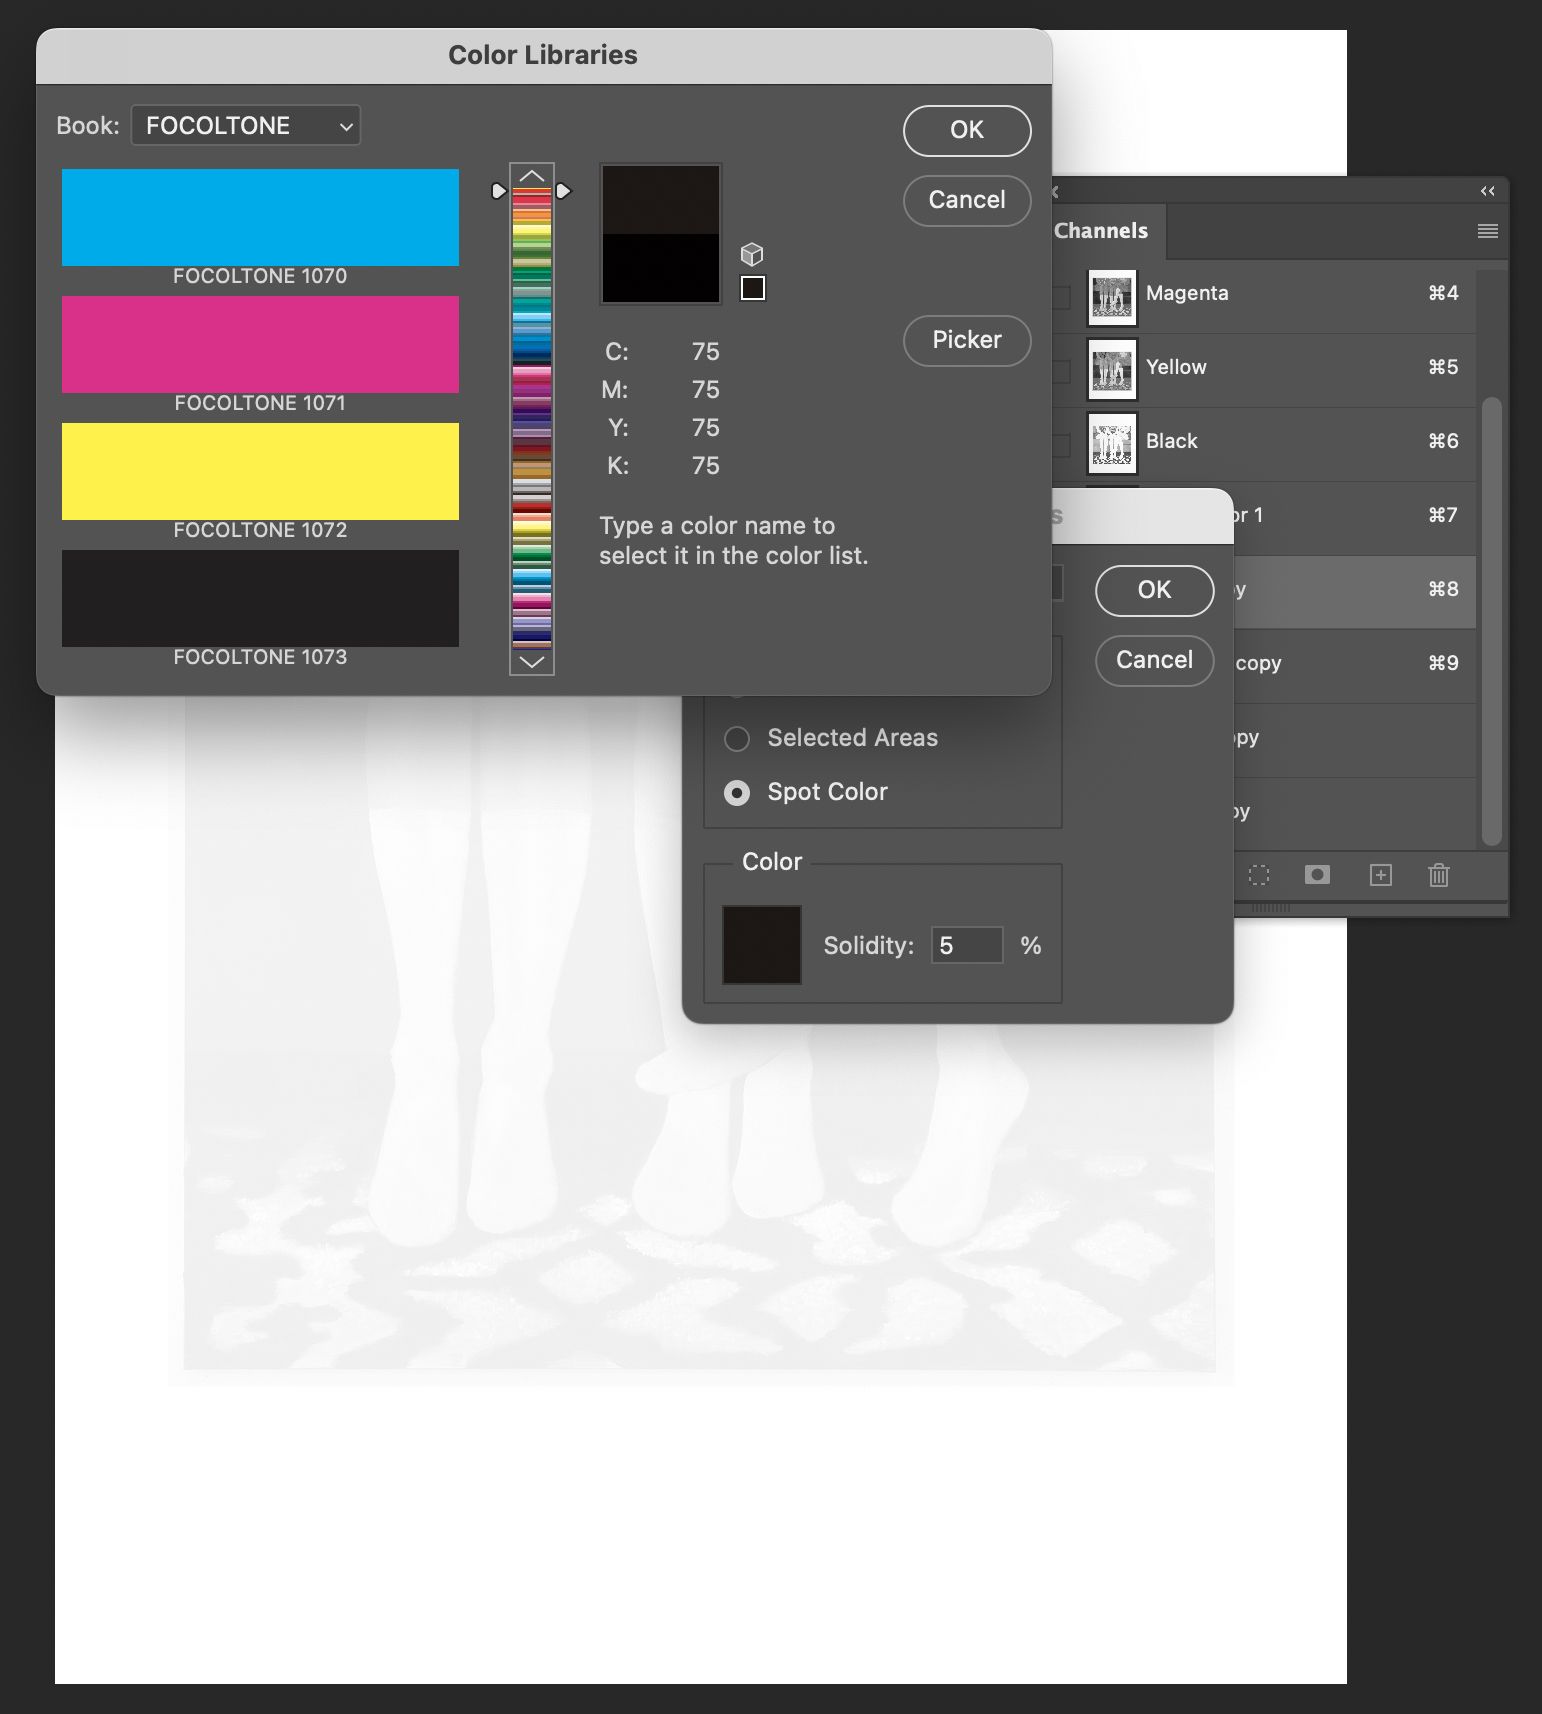
Once the color information has been duplicated, convert all of it into spot colors. Click the Cyan channel thumbnail to open Channel Options. In this panel, under Color Indicates, select Spot Color.
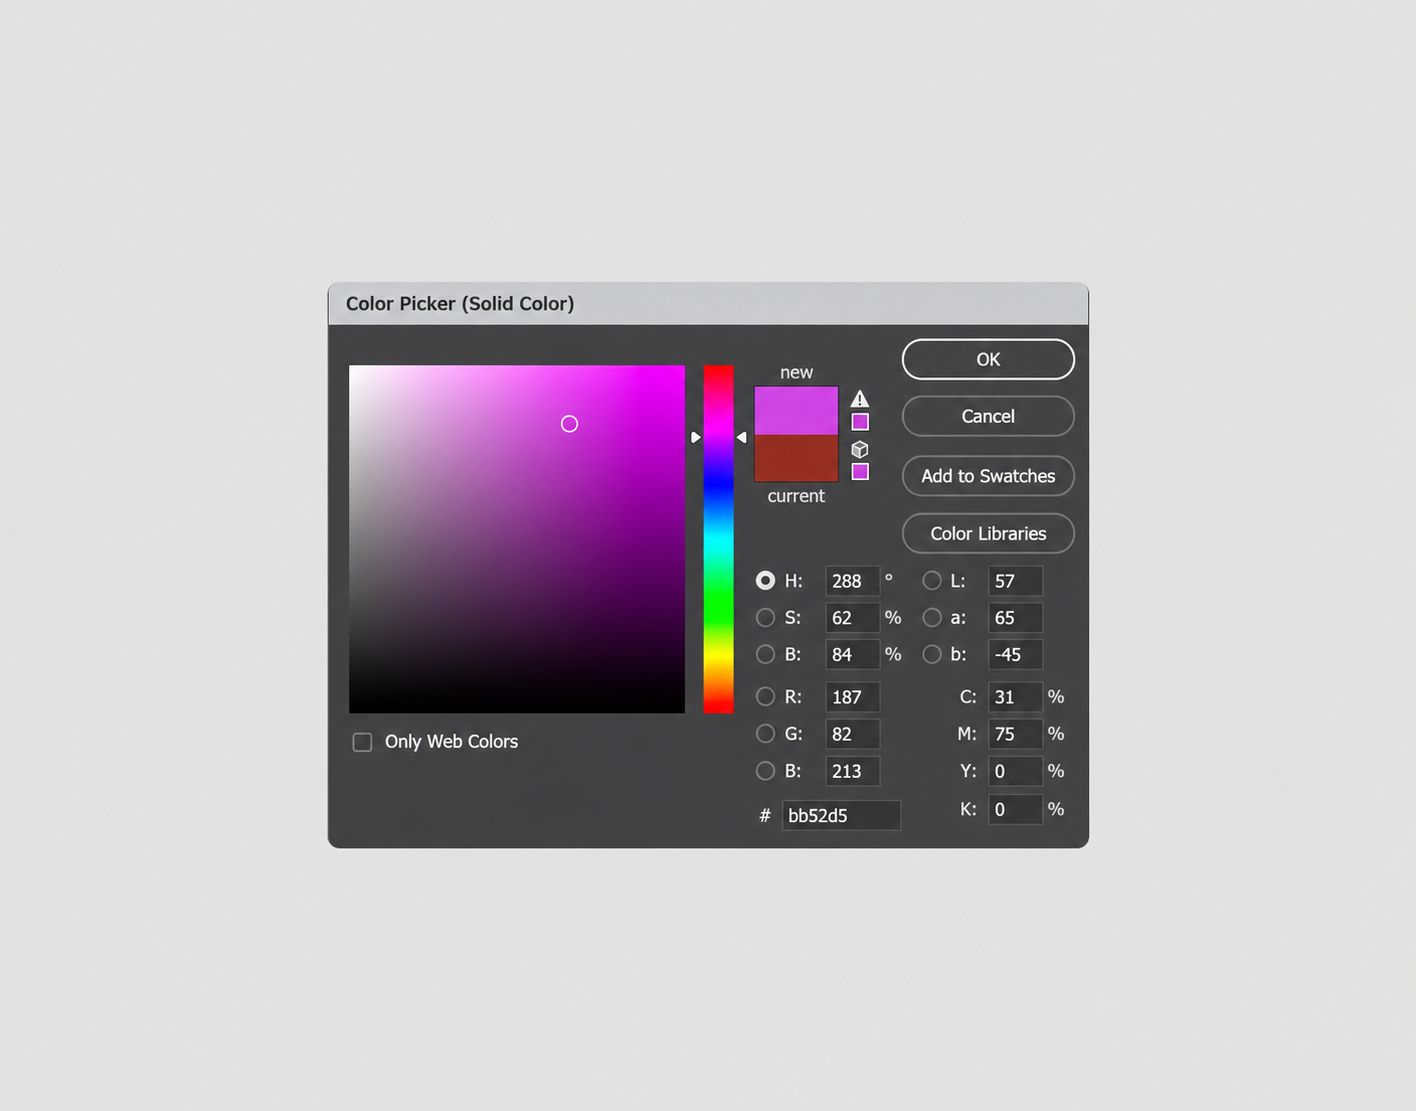
Then, under Color, click the color thumbnail twice to open the Color Picker panel and select Color Libraries. Repeat this process for the Magenta, Yellow, and Black channels until all four channels have been converted into their respective spot colors.
Raster
This process converts the color information from pixels into bitmap data so that the ink can pass through the screen mesh during printing.
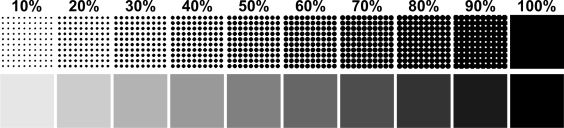
Fig. 6. Comparison of Pixel and Raster.
Steps for converting pixels into a bitmap halftone. Duplicate the first color using shortcuts: press CMD+A (select the entire image), then CMD+C (copy), CMD+N (new window), and CMD+V (paste).
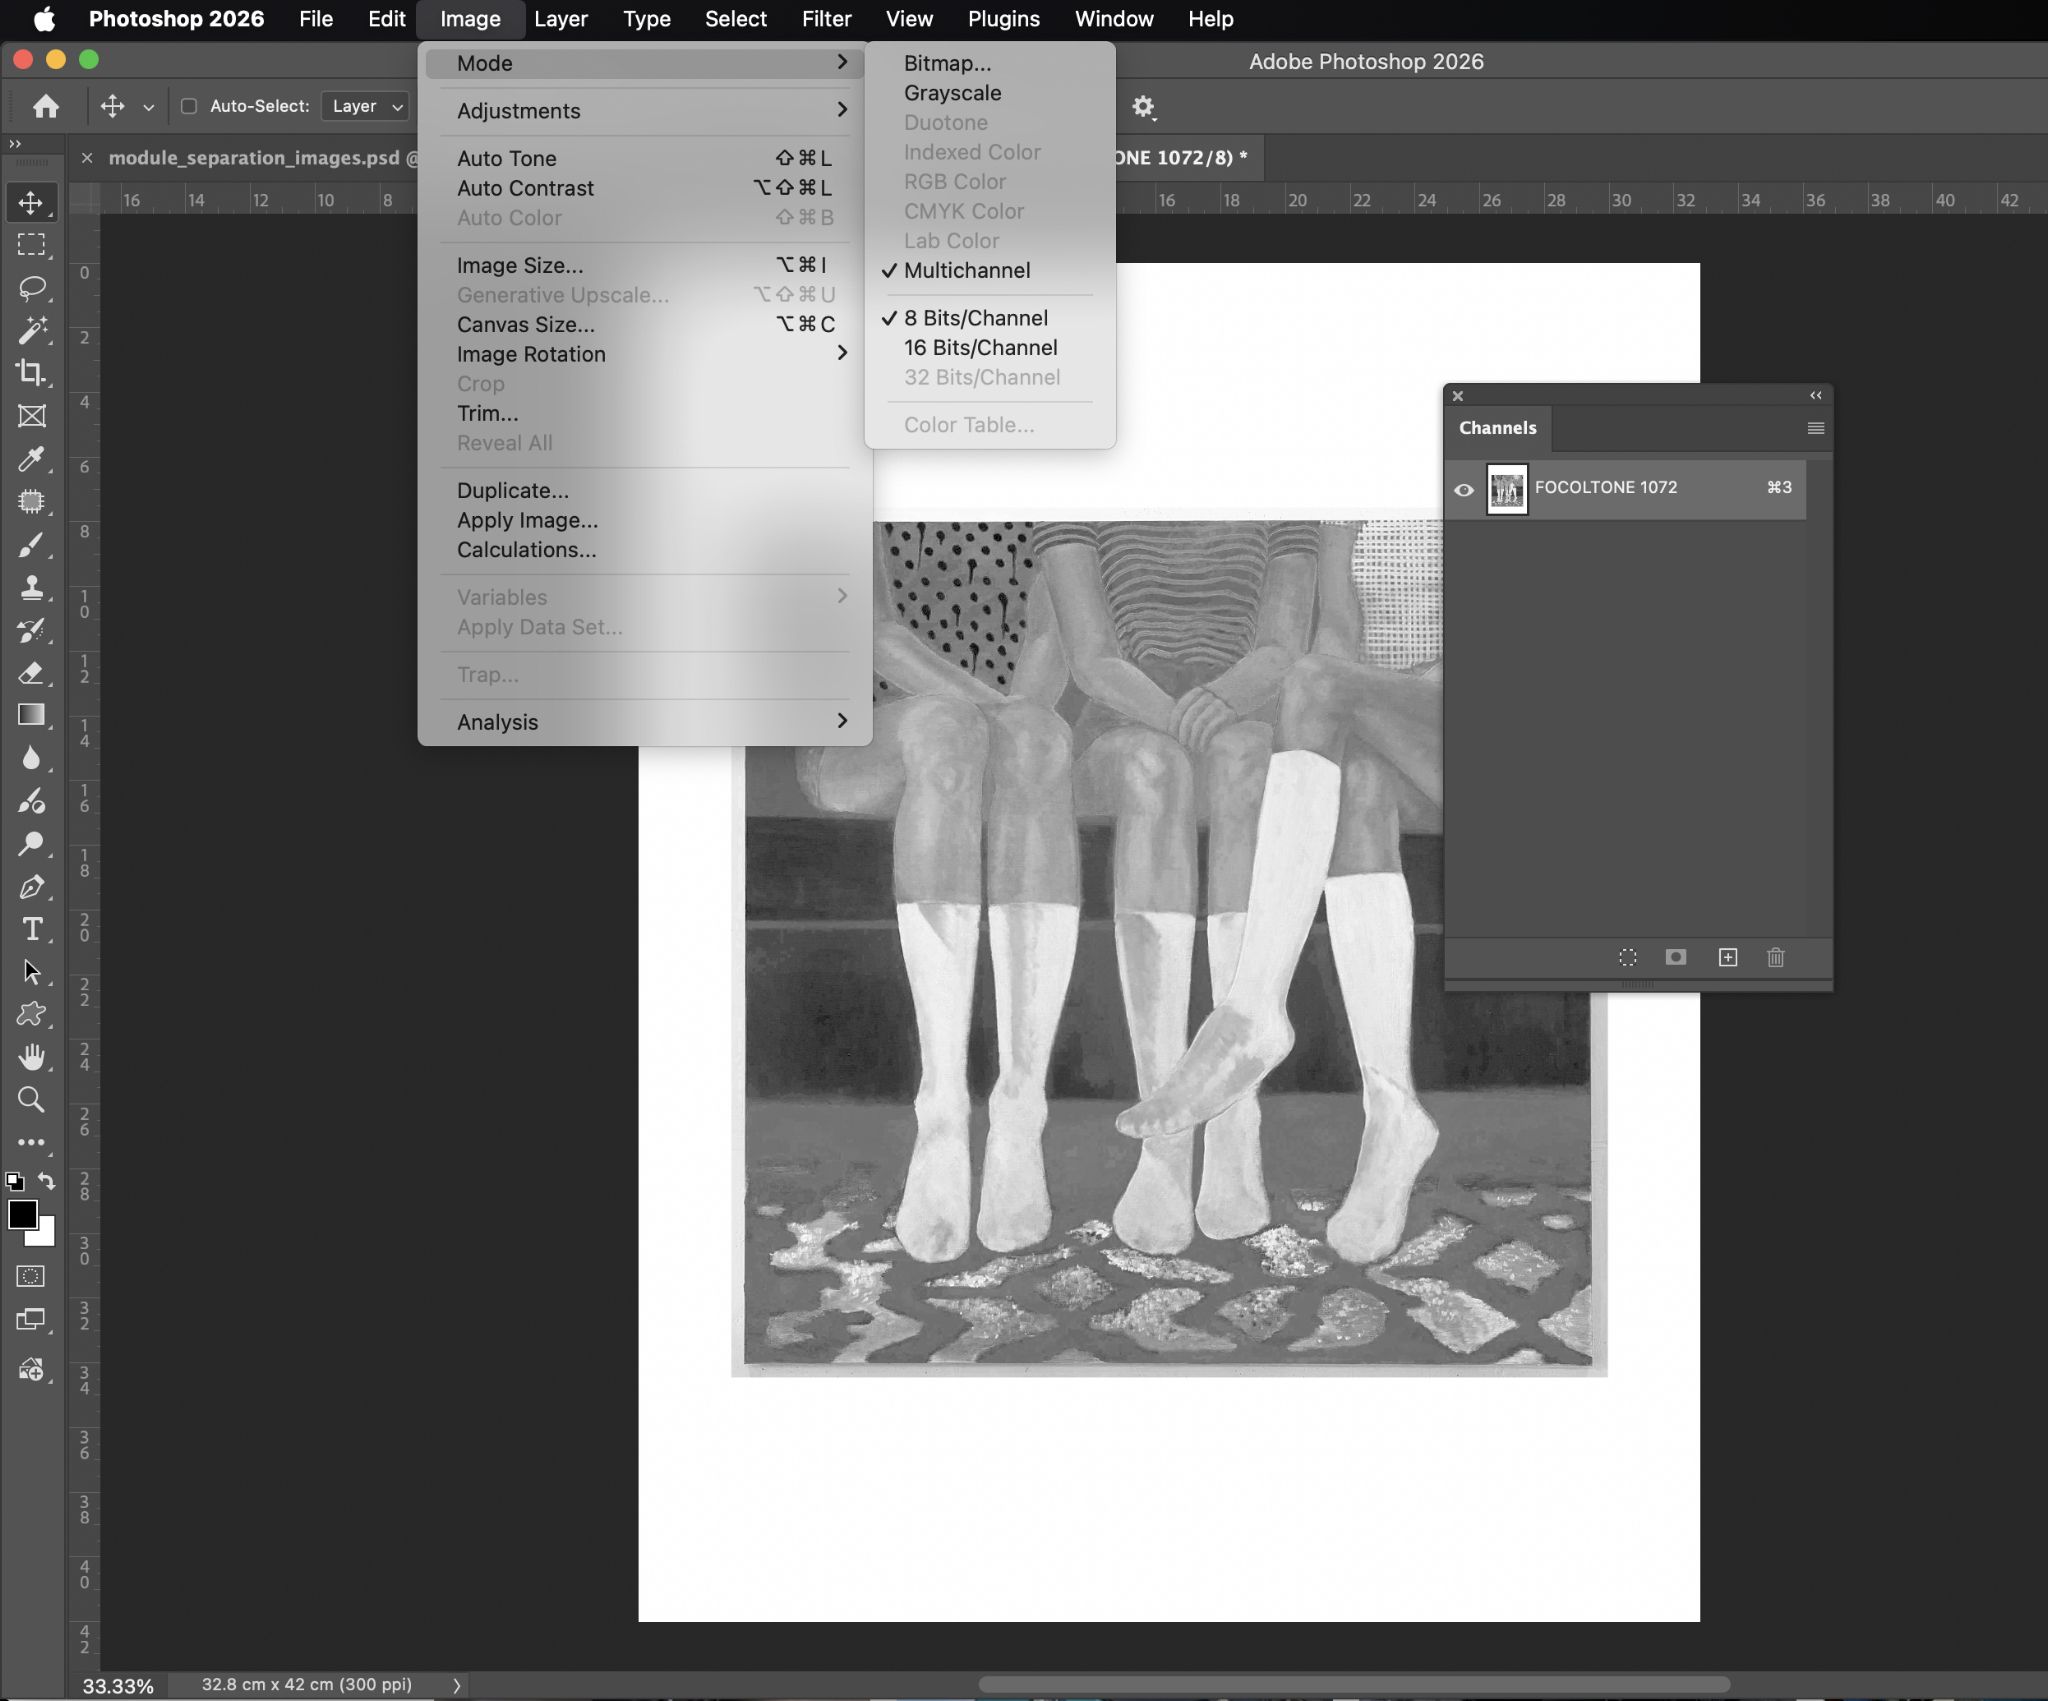
Go to Image > Mode > Bitmap. A new Bitmap panel will appear as shown in Fig. 7. Set Resolution to 300 pixels/inch for both Input and Output. The Output value follows the image configuration established at the beginning.
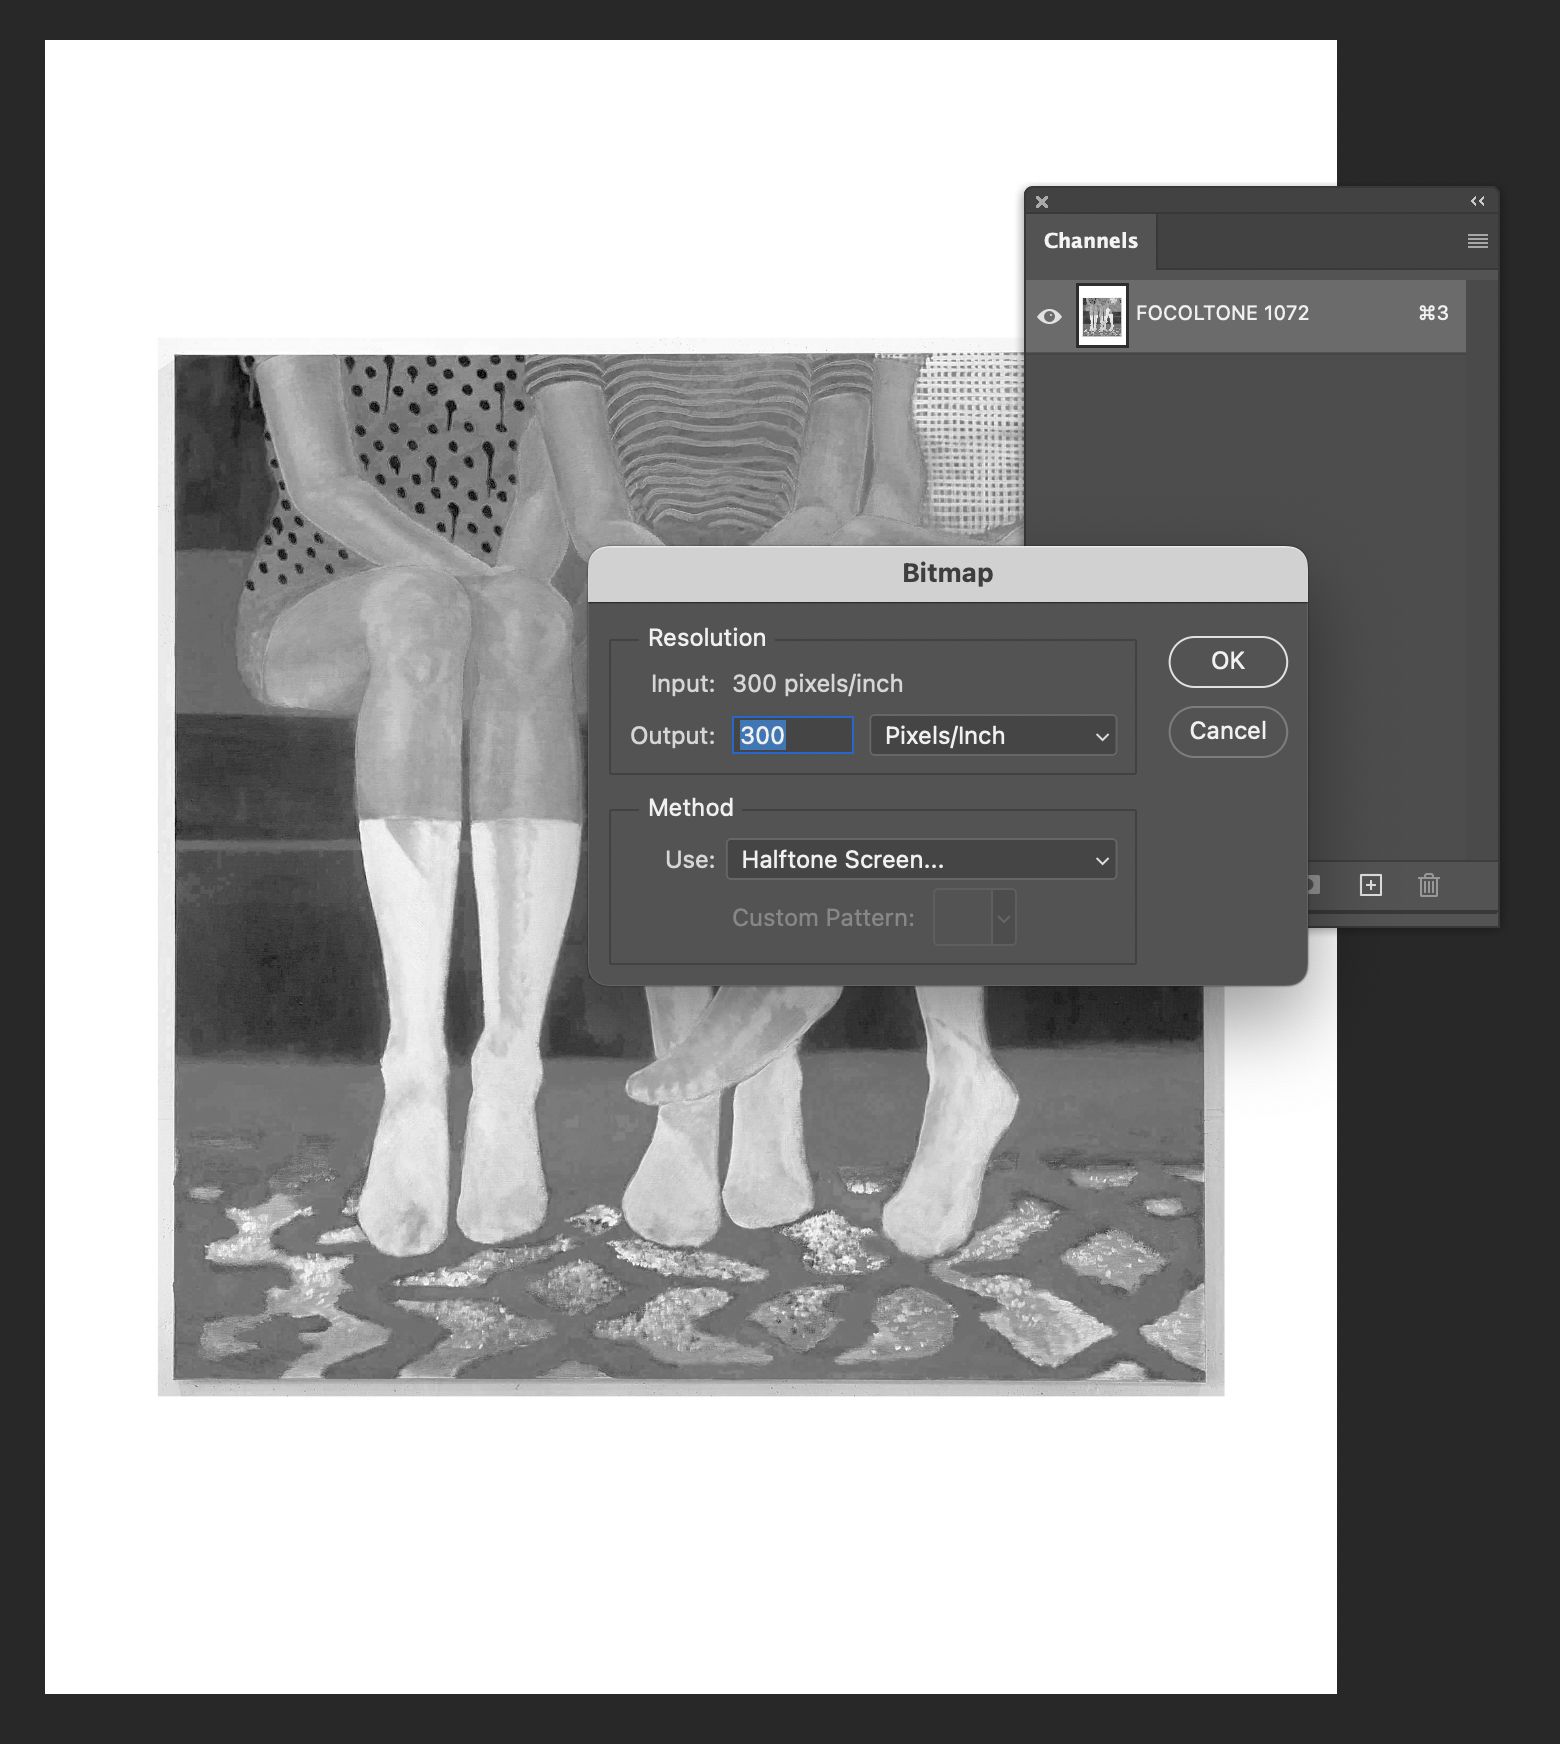
Select Method: Halftone Screen.
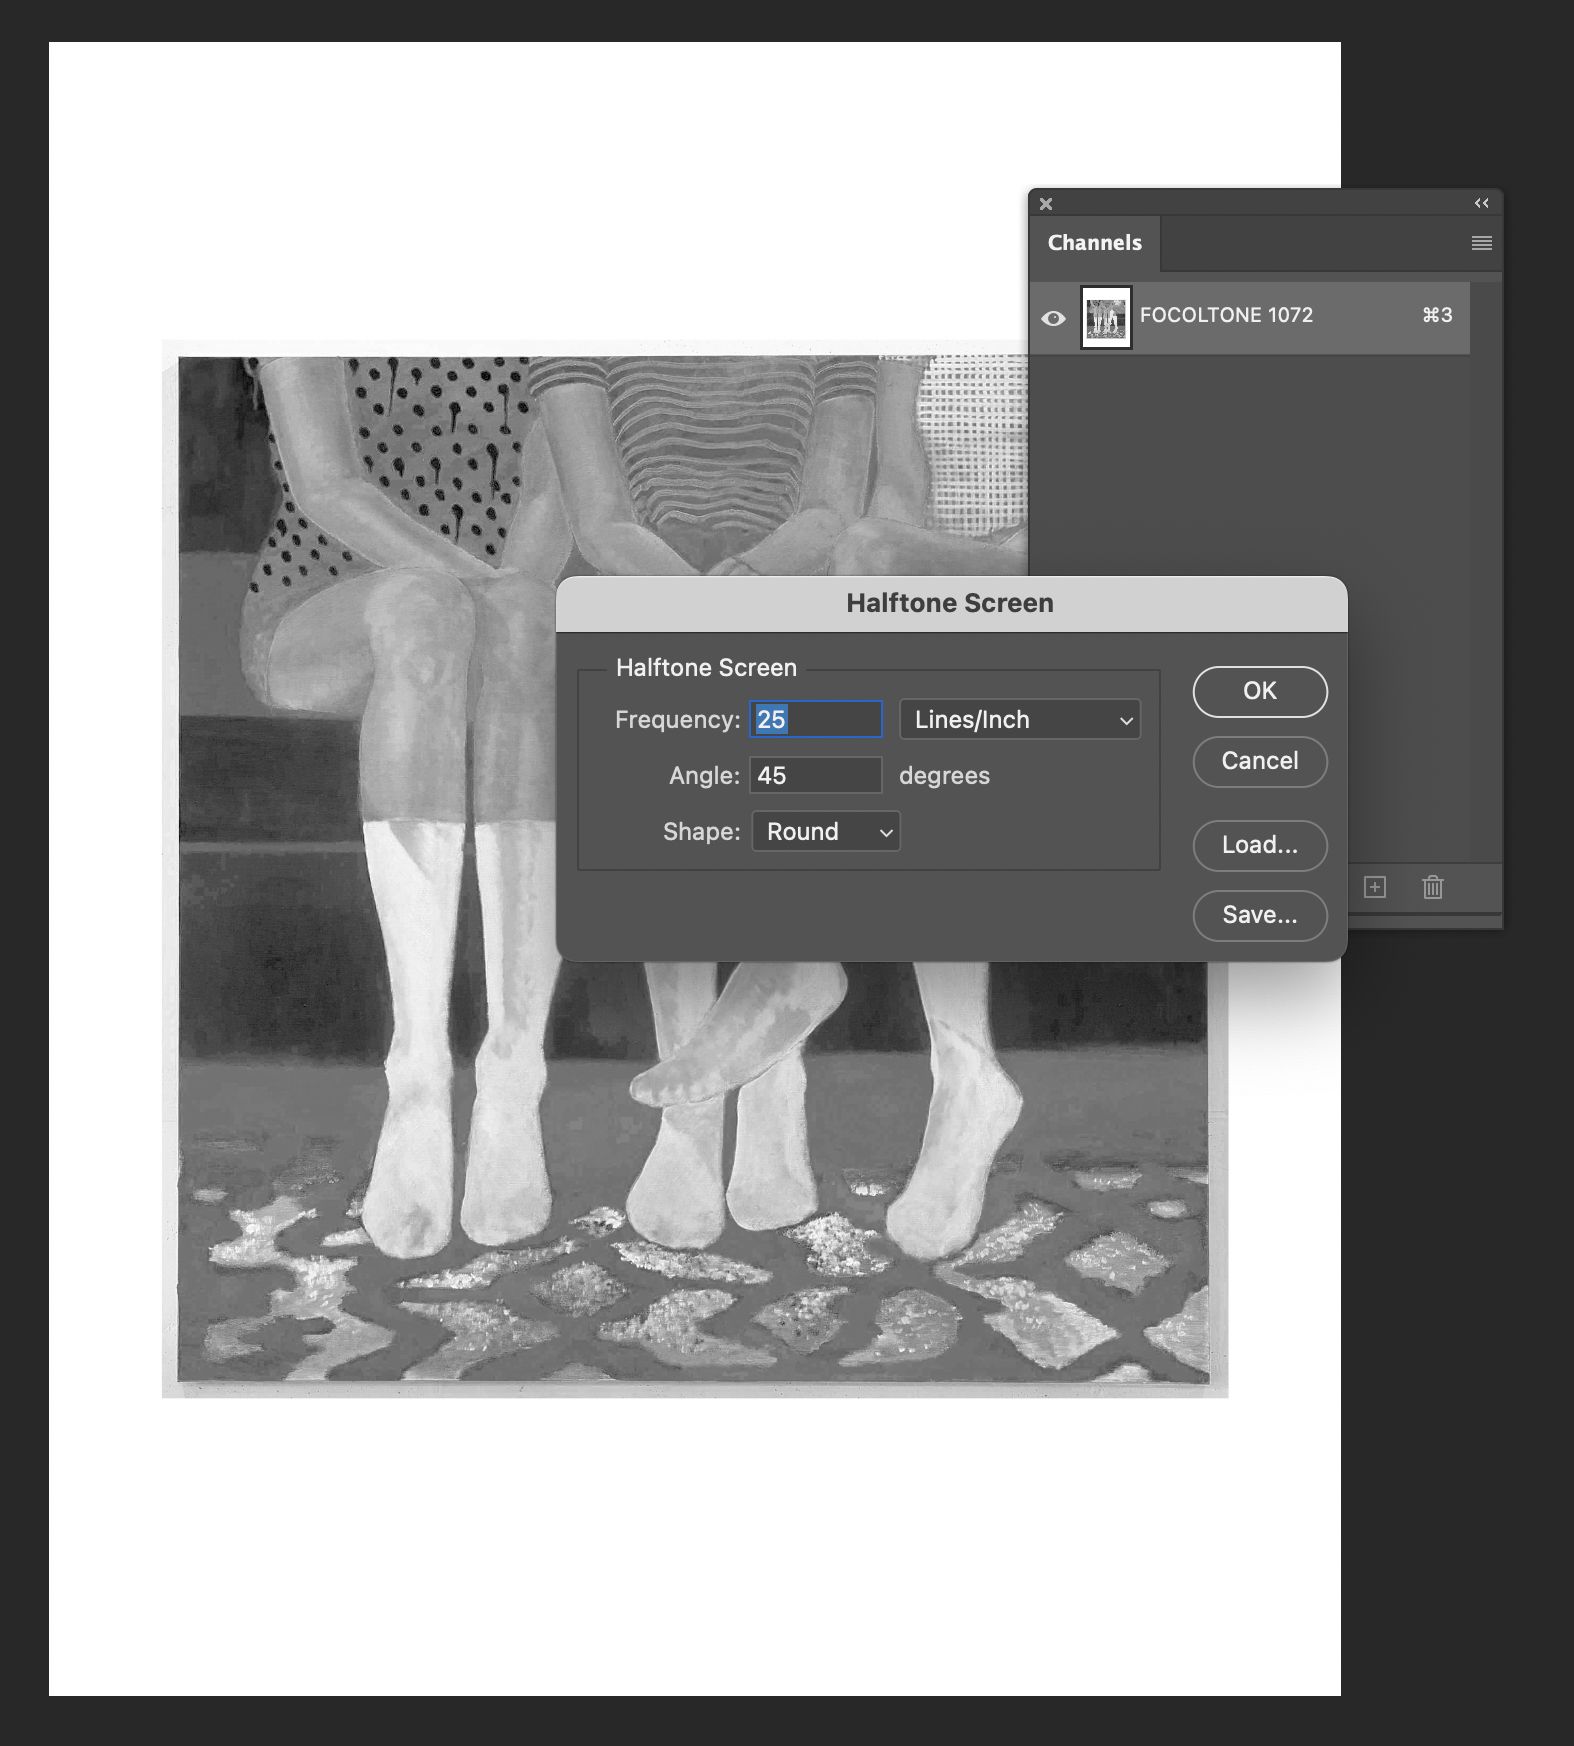
In the Halftone Screen panel, we will set the Frequency (lines/inch), Angle, and Shape values.
A brief explanation of Frequency: it determines the spacing and size of the raster dots generated from the color information and is usually measured in lines per inch (lpi). The higher the Frequency, the closer together and finer the dots become. However, in screen printing, a frequency that is too high can make the dots too small for ink to pass through the screen mesh, causing image detail to be lost during printing.
Angle is the rotation of the raster dot pattern, measured in degrees. This angle is important because when multiple colors are printed on top of one another, the dot patterns can interfere with each other and create an unwanted wavy pattern called moiré. To avoid this, each color is usually assigned a different angle, such as the common combination of 15, 45, 75, and 90 degrees for four colors.
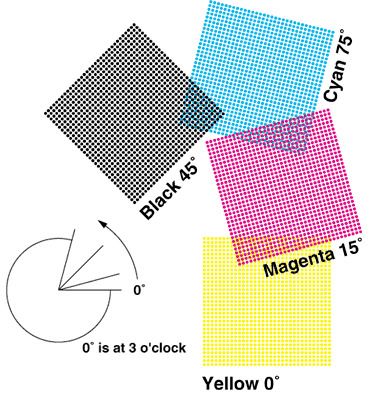
The greater the angular separation between colors, the lower the risk of moiré. Shape determines the form of the raster dots themselves. They can be round, elliptical, square, diamond, or line. This shape affects how color gradients appear, especially in highlights and shadows: round dots tend to produce the smoothest gradients and are commonly used, while shapes such as lines are often used for specific textural effects or when ink has difficulty passing through the mesh with small dots.
Author
M Fahriza Ansyari
Disciplines
Tutorial, Publishing